Drum Brake Lining Replacement: Riveted vs Bonded, Installation & Bedding-In
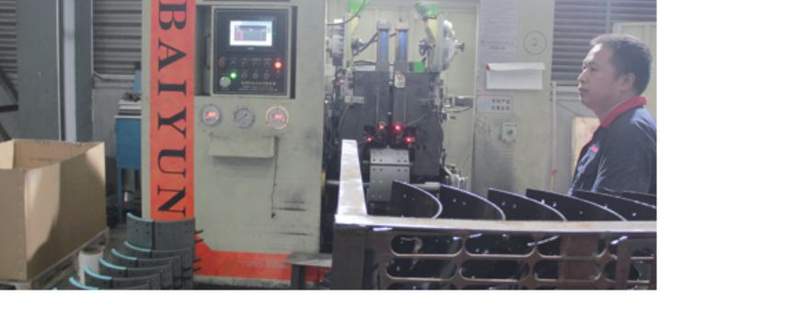
Brake lining replacement is a routine maintenance job — but on a heavy-duty truck or trailer it is also a safety-critical one. A lining that is riveted too deep, bonded with the wrong adhesive or installed without proper bedding-in can fail early, score the drum or fade on a long descent. This guide covers the two fixing methods, the installation steps and the bedding-in procedure that determine how long a new lining actually lasts.
1. Riveted vs Bonded Linings: Which Method Is Right?
Every drum brake lining is either riveted or bonded to the shoe. Riveted linings are fixed with countersunk rivets and are the standard for European and Japanese commercial vehicles such as the WVA 19xxx series; bonded linings are glued with heat-cured structural adhesive and are common on lighter and medium-duty applications.
| Criteria | Riveted | Bonded |
|---|---|---|
| Holding strength | Mechanical, inspectable | Full-surface, high shear |
| Rivet-head wear limit | Replace at ~1.6 mm remaining depth | n/a — adhesive not visible |
| Maximum lining thickness | Typically up to 22–25 mm | Usually up to 16–18 mm |
| Service preference | Heavy-duty truck & trailer | Light/medium duty, some buses |
| Field repair | Re-rivet on the shoe | Needs controlled heat cure |
For fleets running heavy trucks and trailers, WVA 19487, WVA 19488 and WVA 19246 are typically supplied riveted. Bonded lining is chosen when drum temperature stays moderate and the thinnest possible lining assembly is wanted.
2. Inspect the Old Lining Before You Install
Wear patterns on the old lining tell you whether the wheel end is healthy. Toe-and-heel wear (more wear at both ends) points to a worn camshaft or incorrect anchor pin setting; one-sided wear points to a seized adjuster or a bent shoe web. Installing a new lining over an unresolved wheel-end fault will reproduce the same failure.
Also check the shoe shell itself: cracked webs, elongated anchor pin holes or a worn cam roller pocket mean the shoe should be scrapped, not re-lined. Our brake lining material test guide explains the quality checks a lining should pass before it is fitted.
3. Riveted Lining Installation: Step by Step
- Clean and degrease the shoe platform and the back of the lining.
- Drill or align the lining holes to the shoe hole pattern; chamfer countersinks so rivet heads sit below the lining face.
- Fit the rivets with a hydraulic or pneumatic riveter, working from the centre outwards.
- Check rivet head depth — at least 1.6 mm below the lining surface when new; below 1.0 mm, the drum will be scored at the end of lining life.
- Grind or chamfer the lining edges to match the drum radius and remove any high spots.
4. Bonded Lining Installation
Bonding uses a two-part structural adhesive that must be applied to a freshly abraded surface, cured under clamp pressure and — for heavy-duty grades — heat-cured to the adhesive manufacturer's schedule. Skimping on cure time is the most common cause of early lining separation. Bonded assemblies cannot be field-riveted later; if the adhesive fails, the shoe must be stripped and re-bonded.
5. Drum Preparation and Reassembly
Before reassembly, measure the drum: maximum reface diameter and run-out must be within the axle manufacturer's limits. An out-of-round drum will wear any new lining unevenly within the first thousand kilometres. Fit new return springs, hold-down springs, rollers and anchor pins with the lining — reused hardware is a false saving.
6. Bedding-In (Burnishing) New Linings
A new lining has a machined surface with a friction level well below its rated value until it mates with the drum. Bed-in with 20–40 controlled stops from moderate speed, allowing the drum to cool between stops. After bedding-in, check three things: slack adjuster stroke (it will grow as the lining beds), drum temperature across the face (an even heat pattern means even contact) and any brake pull. Never send a freshly relined axle into revenue service without burnishing.
7. Lining Identification: WVA Number, Grade and Batch
Before installation, confirm three markings on the lining: the WVA number (dimensions and arc radius), the friction grade (NAO, semi-metallic or ceramic) and the batch number for traceability. Linings with the same WVA number but different grades are not interchangeable on one axle — a NAO lining paired with a semi-metallic one will cause pull and uneven wear. Store linings flat, dry and indoors: hygroscopic binder systems can absorb moisture in damp storage and change friction behaviour in the first service weeks.
8. Common Installation Mistakes
- Riveting too shallow — heads proud of the lining score the drum immediately.
- Reusing springs and rollers — fatigued hardware causes drag or brake pull.
- Mixing lining grades on one axle — different friction levels cause uneven braking.
- Skipping bedding-in — the vehicle under-brakes for the first hundreds of kilometres.
- Ignoring drum condition — an out-of-round drum destroys new linings quickly.
Key Takeaways
- Riveted linings suit heavy-duty truck and trailer service; bonded suits lighter duty
- Rivet heads must stay at least 1.6 mm below the lining face when new
- Fix the wheel-end fault before installing new lining — it will fail the same way otherwise
- Always burnish new linings with 20–40 controlled stops before revenue service
Need Factory-Direct Brake Linings?
SAITE Friction supplies riveted and bonded drum brake linings for trucks and trailers, with ECE R90 documentation and fast OEM-style lead times. Tell us your WVA number and get a quote today.